

Whenever I want to show the waves & how angry the sea is, I always shoot 1 long exposure to capture the motion in the clouds. A normal exposure time for somthing like this image, is between 1-3 minutes & then shorten my shutter speed down to about 1-1.5 sec to get that silky movement that has that just right texture to it. I'll take it into post & use PS to blend the different areas of each wave. In this image I used 4 frames & masked out only certain areas of each image where I thought had that perfect wave motion.
Layers in PS
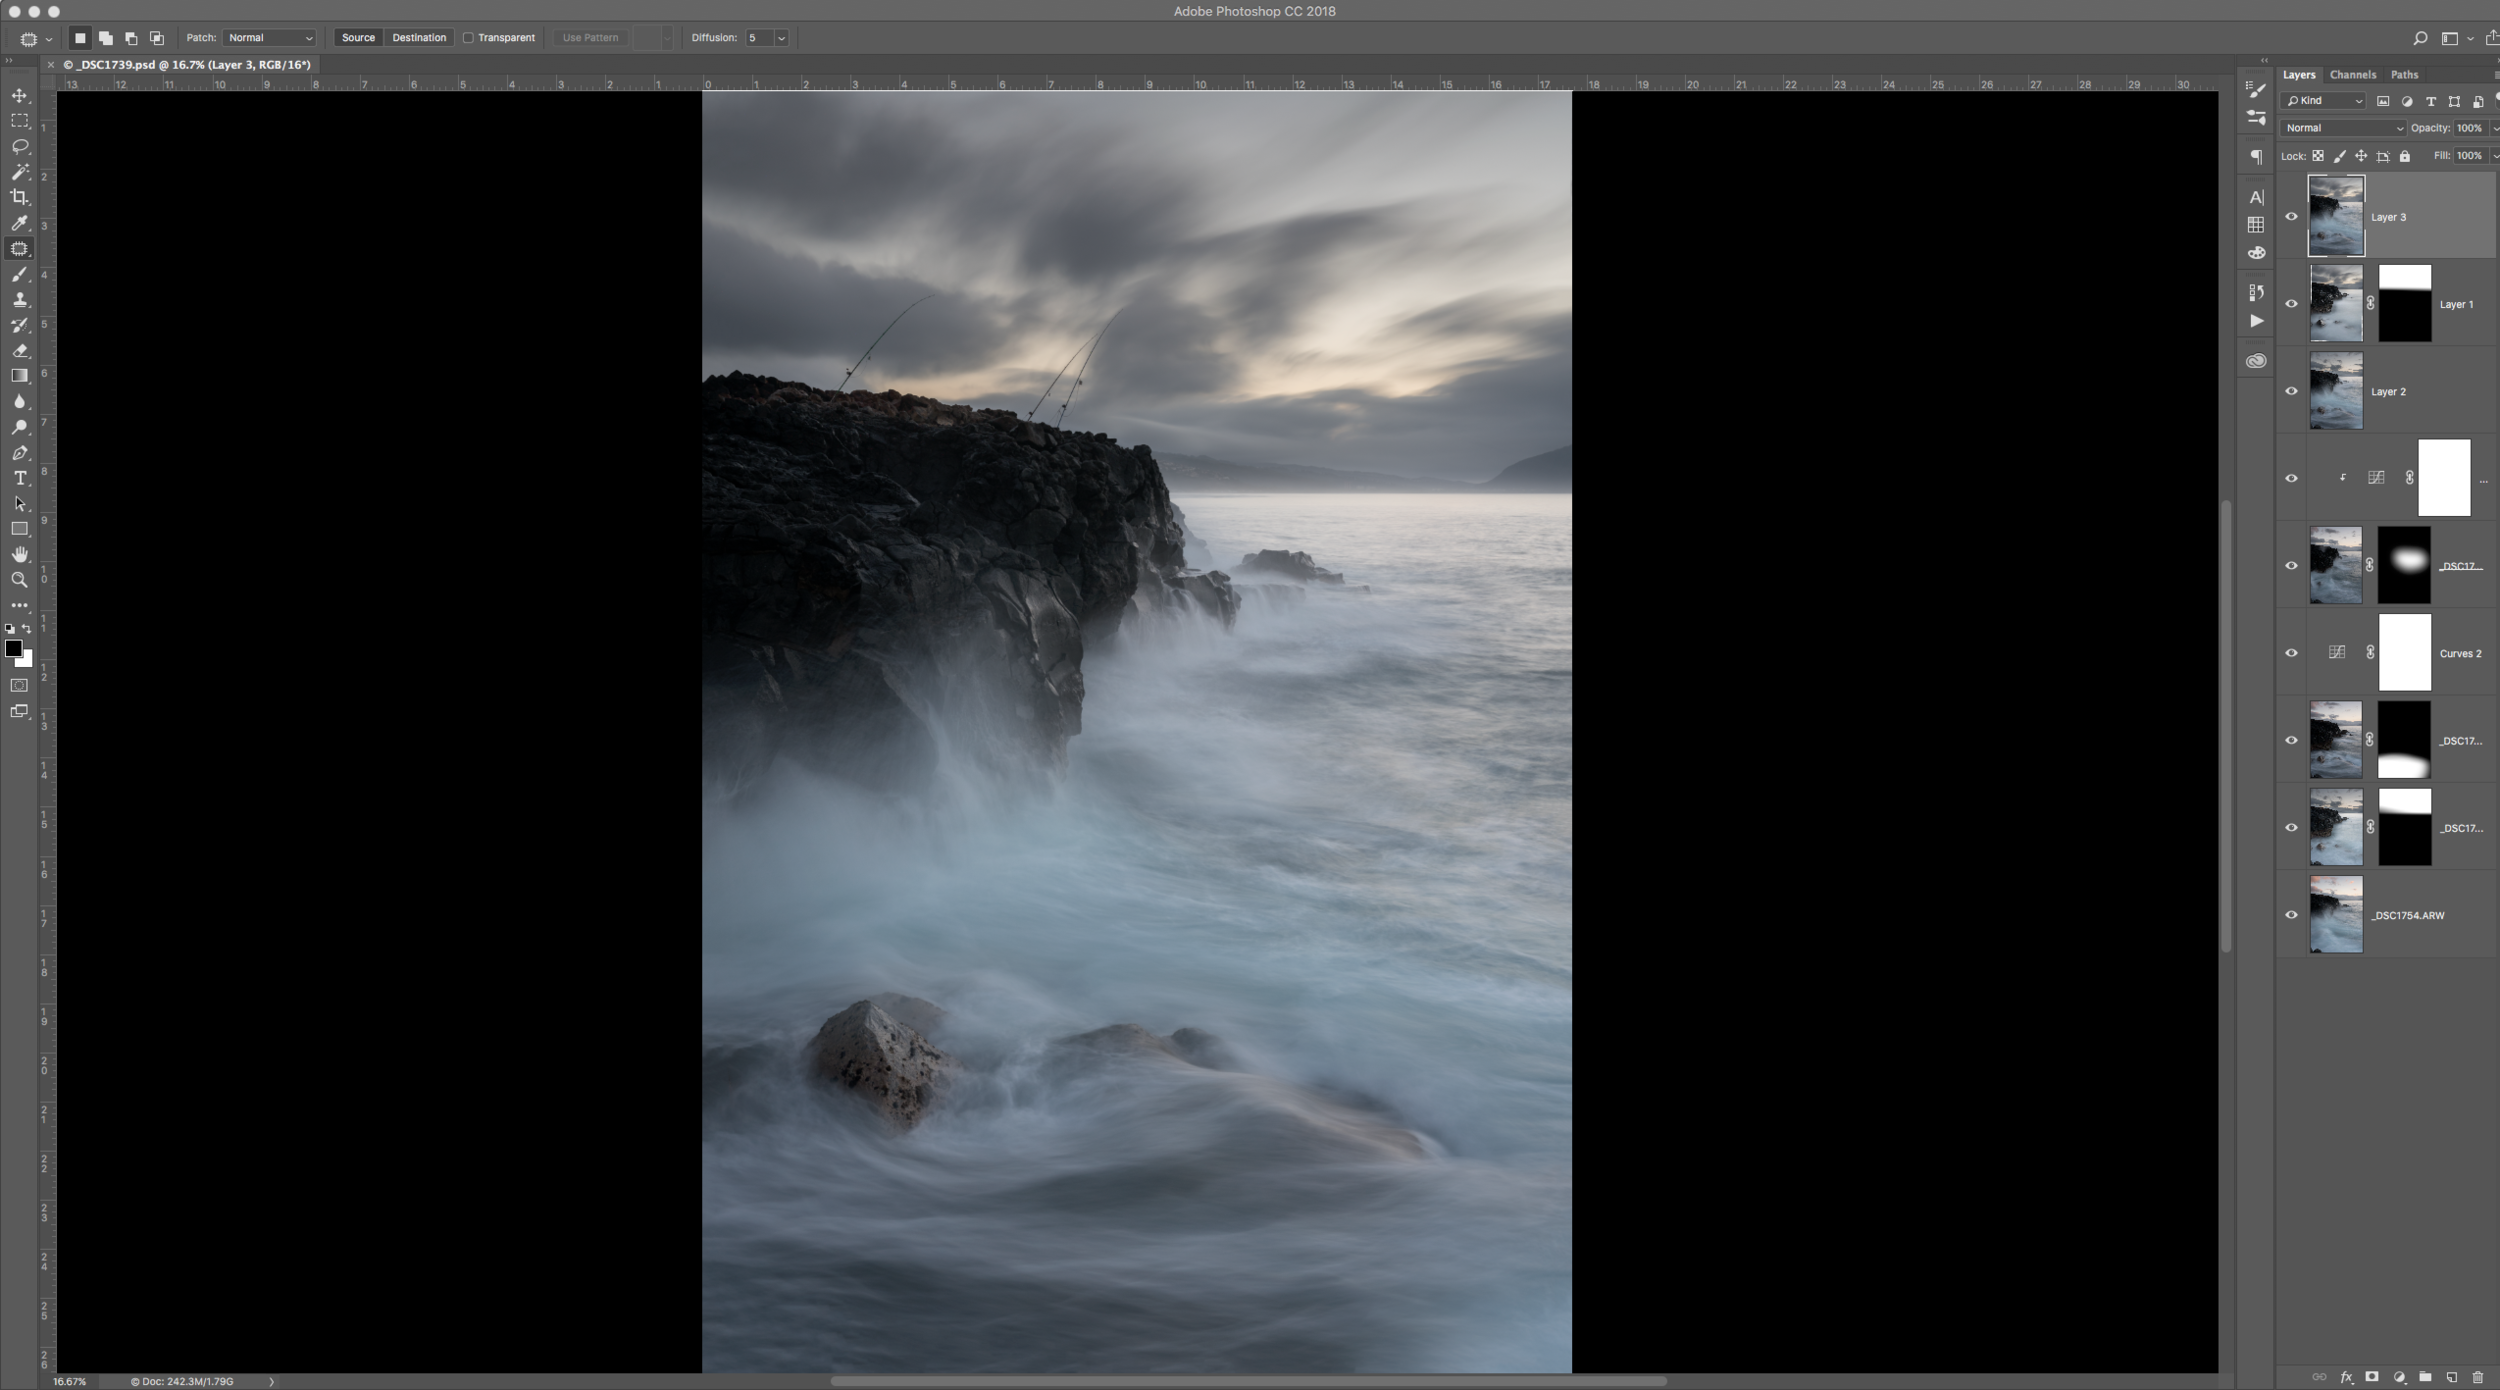
In the image above the bottom, 4 layers have the 4 frames I used to blend. You can see the white areas on the mask is where I revealed for that specific image. Above the 3rd layer, I added a curves adjustment to match the exposure to the layers below. The 5th layer from the bottom is showing only the rocks with the water rushing back into the sea & then another curves adjustment on the 6th layer to match the exposure.
Layer 7 is a is a comp layer of all the underlying layer into 1 single layer. Layer 8 is a 2nd adjustment to the sky & remove the white halo around the edges of the dark rock on the top of the cliff. The haloing normally occurs when too much contrast,& clarity is added, so I made a selection around the rocks & cloned out the white halo with the clone stamp tool set to darken. Save in PS ...

Round trip back to LR & did my final adjustments, by bringing up the exposure just slightly & then using the Oval Radial Filter to selectively bring up the Whites on the waves & remove some of the shadows on the rocks. I don't time myself when I do edits like this but I'd say a good 45 minutes was spent working on this final image. It was fairly an easy blend, had some noise issues at the end when I brought up the shadows on the rocks but I went back in & cloned all the color noise out in PS. Friday I'll post almost the exact same image with a 3 minute exposure, it changes the mood so dramatically!
Aloha a hui hou my friends!
www.ryansakamoto.com
Copyright 2018 Ryan Sakamoto, All rights reserved